December 2023

Benefits of having a good and maintained lawn

A healthy lawn is more than just a green carpet. It’s a place to entertain friends, play with kids and pets, or just relax in the sun with a good book. It’s a reflection of the home itself, and it increases the value of the property.

According to Lawn Maintenance Fort Myers A great-looking landscape requires a mix of basic care and periodic spa treatments to keep grass looking its best. A standard lawn maintenance service should include mowing, fertilization and watering. But most yards require more than just this to truly thrive.

Weeding: Weeds steal sunlight, nutrients and moisture from the grass, so keeping them under control is essential to a lush yard. Regular weeding keeps most species of broadleaf weeds (including dandelions, clover and chickweed) from growing in the first place, eliminating a lot of hassle down the line.

Watering: A deep weekly soaking is better than frequent shallow waterings, which can promote disease. It also allows roots to extend deeper into the soil, cutting off their competition with weeds for moisture. It’s important to know your soil type, since sandy soils dry out faster and need to be watered more often, while clay soils hold moisture longer and can go longer between soakings.

Fertilizing: The numbers on the fertilizer bag reveal the percentages of actual nitrogen and other nutrients, so match the product to your grass’s needs. Fertilizer that’s too high can actually harm the lawn, while too little does no good. It’s also essential to set a schedule and stick with it, since over-fertilizing is just as harmful as not fertilizing at all.

Aerating: Poking holes in the soil helps oxygen get to grass roots, so aeration is another “spa treatment” for your lawn. It’s particularly beneficial for thick, dense grasses and clay soils. It’s typically done with a tool that looks like two hollow tubes on the end of a handle, but there are also manual methods for the DIYer.

Thatch removal is another lawn-care “spa treatment.” This layer of dead and living organic matter accumulates between the soil surface and the grass blades, making them appear dull or brown. It’s usually done with a mechanical rake, but some homeowners prefer to use a power broom to avoid disturbing the soil.

Pest control: Fungus that feeds on the grass can destroy it if not controlled. A healthy lawn usually resists these organisms, but if it becomes infected, you may need to treat the area with fungicide.

Lawn Renovation: If moss, weeds or insects have become overwhelming, a full lawn renovation is sometimes necessary. A complete lawn renovation includes herbicide dethatch and reseeding, while a partial renovation involves a weed killer and reseeding only the affected areas.

These are just a few of the many landscaping ideas to help you make your outdoor space your own. Whether you want it to be simple and understated or extravagant and luxurious, the right landscape can add beauty and value to your home. Just be sure to hire a trusted landscaping contractor, so you can rest assured that your lawn is in good hands.

A Comprehensive Guide to Shower Installation for Bathroom Remodeling

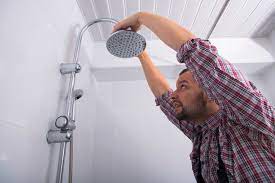
Bathroom remodeling is a popular home improvement project, and one of the key elements that can transform the space is the installation of a new shower. Whether you’re upgrading an existing shower or adding a new one, proper installation is crucial for functionality, aesthetics, and long-term durability. In this guide, we’ll walk you through the essential steps and considerations for a successful shower installation during your bathroom remodeling project.


Planning and Design:

Before diving into the installation process, careful planning and design are necessary. Consider factors such as the size of your bathroom, the type of shower enclosure you want (e.g., alcove, corner, or walk-in), and the plumbing layout. This is also the time to choose the style of your shower, including the type of shower head, tiles, and other design elements.

Gather Materials and Tools:

Once the design is finalized, gather all the necessary materials and tools. This typically includes the shower pan or base, wall panels, waterproofing membrane, mortar, tiles, grout, plumbing fixtures, and the shower door or curtain. Having everything on hand before you start will streamline the installation process.

Prepare the Subfloor:

Before installing the shower base, ensure that the subfloor is level and properly prepared. This may involve removing the existing flooring, repairing any damage, and applying a waterproofing membrane to prevent moisture issues.

Install the Shower Base:

Follow the manufacturer’s instructions to install the shower base. This often involves setting the base in mortar for stability. Ensure that the base is level and properly aligned, and allow sufficient time for the mortar to cure.

Waterproofing:

Waterproofing is a critical step to prevent leaks and water damage. Apply a waterproofing membrane to the walls and floor surrounding the shower area. Pay special attention to seams, corners, and any penetrations for plumbing fixtures.

Tile Installation:

If you’re using tiles for the shower walls, follow a systematic approach to apply thin-set mortar and set the tiles in place. Use tile spacers for even grout lines, and be meticulous in cutting tiles to fit corners and edges. Allow the adhesive to cure before grouting.

Grouting:

After the tiles are set, apply grout to fill the spaces between them. Use a rubber float to press the grout into the joints, and then wipe away excess grout with a damp sponge. Allow the grout to cure completely before applying a sealer to protect it.

Install Plumbing Fixtures:

Once the tiles and grout are in place, install the plumbing fixtures such as the showerhead, faucets, and handles. Connect the plumbing according to local building codes and manufacturer instructions.

Shower Door or Curtain Installation:

Complete the enclosure by installing the shower door or curtain. Make sure the door is properly aligned and sealed to prevent water leakage. If using a curtain, choose a waterproof material and install it securely.

Final Touches:

Complete the installation by checking for any remaining details, such as caulking joints, applying finishing touches, and ensuring that all elements are properly sealed.

Proper shower installation is a crucial aspect of bathroom remodeling that demands careful planning, attention to detail, and adherence to best practices. Following the steps outlined in this guide will help you achieve a functional, stylish, and durable shower that enhances the overall appeal and value of your bathroom. Remember to consult with professionals if needed, adhere to local building codes, and enjoy your newly renovated bathroom space.

Budget-Friendly Elegance: How Cabinet Refinishing Transforms Your Kitchen

As the seasons change and springtime approaches, it’s time to spruce up your home. One of the most important rooms to refresh is the kitchen. Cabinets are a big part of your kitchen, and they can easily get outdated. It may seem like a daunting project to replace them, but there’s good news. There are ways to make your cabinets look new again, and they won’t break the bank.

One option is to refinish your existing cabinets. This is done by cleaning the cabinets, sanding the surfaces, and applying a fresh coat of paint or stain. This process is much cheaper and more time efficient than removing and replacing them. Additionally, it’s an environmentally friendly option that avoids filling up landfills with discarded cabinet boxes.

The key is to choose a color that is neutral, and that will blend well with any decor you may have in the room. It’s also important to apply a high-quality primer, and to use a spray painter for even coverage. This will help ensure a flawless finish. Once the cabinets are finished, it’s a good idea to apply a clear topcoat to protect them from everyday wear and tear.

Another great option for transforming your kitchen is to change out the hardware. Adding new knobs and pulls can give the cabinets a whole new look. It’s also an easy way to brighten the space and add a pop of color. Finally, if your cabinets are dark and dingy, lightening them with a fresh coat of paint can make the space feel bigger and brighter.

If you’re looking for a more dramatic change, consider changing the door and drawer fronts, as well as the cabinet boxes. This will create a completely different aesthetic, and can be achieved at a fraction of the cost of a complete kitchen remodel. This can be done in a variety of styles, from traditional to contemporary, and you can even choose different types of wood and veneers to further customize your vision.

Experts in kitchen renovations, from your local Tampa cabinet refinishing company can help you transform your home with a variety of options for cabinet refacing and refinishing. Contact a kitchen cabinet refinishing professional today to schedule a consultation and discover how we can bring your dream kitchen to life.